Hello Friends! Leah here today. I’m happy because today marks the last day of school before Spring Break and I have a freebie for you. That’s just a recipe for joy right? Today I want to share some printable tips with you and share a fun free printable.
Printables are pretty much my favorite. I know, I’m biased because I have a shop full of them, but even so, I love using them in my journaling. In case you’re new to this Bible Journaling world and don’t know what I mean when I talk about printables, let me explain. Printables are digital files you can purchase (or sometimes find for free) and print at home. Then you cut out the pieces and glue them on like stickers. Jeanna did a more detailed blog on how to use them a while back, you can find it here.

The great thing about printables is that once you buy the file you can print as many as you want *for personal use*. So if there is one image in particular you love, you can use it multiple times. They’re also great for bible journaling groups. Most shops allow you to purchase classroom licenses to print for groups (you can find ours here). Often, this ends up being a much better deal than purchasing individual sticker sheets or ephemera for a group. That tip is for free because I didn’t think to add it to my list. But now, lets get into those tips and tricks!
1) Find the right paper
You’re obviously going to want to use a color printer in most cases. That’s a given. What may not be widely known is that even with a lower quality printer, you can get great results with the right kind of paper. My preference is to use a matte photo paper. I prefer the Premium Matte Photo Paper from Staples because it’s thick like cardstock. However, I think this one from Canon is similar. I also enjoy using this one by PrintWorks, but be aware it’s thickness is somewhere between cardstock and regular paper.
Another option is to use sticker paper. You can use white sticker paper, although the quality of the print isn’t amazing my experience. The fact that you can peel and stick without having to add glue can be a bonus. You can find clear sticker paper in both matte and glossy finishes and both have great quality results with printing.

Ultimately, the higher the quality of paper you use, the better your printing results will be. Higher quality paper won’t soak up as much ink which results in crisp edges on images and more vibrant colors.
2) Find the right cut style and tools for you
The next thing to determine is how you prefer to have your images cut out and how you can do that best. I prefer to leave a small border of white around the image when I cut. This allows me to not worry about being too precise with my cuts and also makes the images pop when on the page. However, if you prefer to cut right along the image edge you can do that as well.
There are a couple options for cutting tools. First is to just take a pair of scissors and fussy cut by hand. Which is what I do. If you choose this option, I suggest finding a quality pair of scissors that are sharp and fit comfortably in your hands. When you have a lot of images to cut, you don’t want to be uncomfortable or frustrated because your scissors aren’t cutting right. I have a pair of fabric scissors that I actually prefer to use (just know they won’t be great for fabric after you use them on paper).

Another option is to use a cutting machine like a Cricut or Silhouette. This can get a little more complicated, but if you do your research, you can learn how to take non-cut files and transfer them into cut-files for your machine. I’m not an expert on this, but I know there are tons of resources out there if you’re interested. You can even leave a white border or cut right along the edge with these machines depending on your preference.
3) Stick it to ’em
You may think that all glue is created equal. I beg to differ. Sure, maybe at the end of the day the printable is stuck to the page, but for how long and how does it look? I recommend steering clear of liquid glues like Elmers or Mod Podge and even glue sticks. If you use liquid glue it can wrinkle the back side of your pages and can just get plain messy. With glue sticks they tend to dry and lose their stickiness after time, potentially meaning your image could fall off.
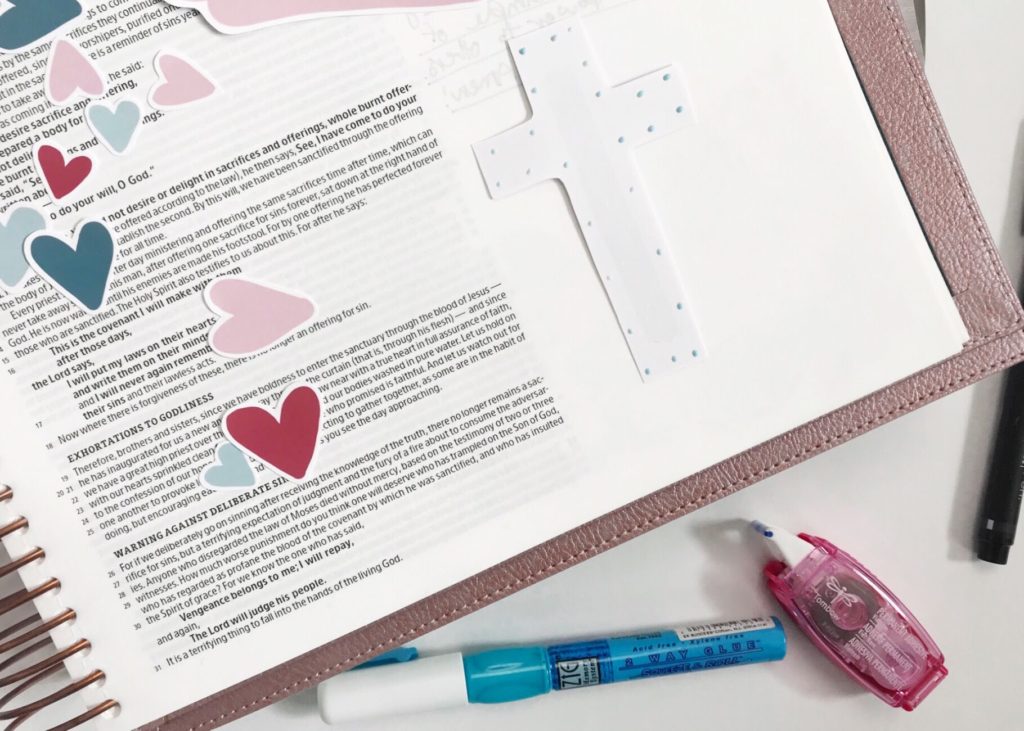
I preffer a combination of a double sided tape roller and this pen glue. I swipe the roller in the center of the image and then use *small dots* of the pen glue around the edges. The pen glue is strong enough to give it hold, but it allows for such tiny dots that don’t affect the back side of the page. If you aren’t picky about your edges being stuck down you can even omit the pen glue and just stick with the tape roller.
Freebie!
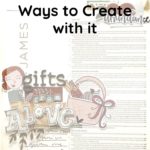
I know, finally! Getting to the good stuff! To help spread the joy of printables I’ve created this adorable printable for you all to enjoy. It’s one of my first times creating completely digital art, so it’s not exactly perfect, but it is pretty cute, if I do say so myself. I thought now would be a good time, since we are working through Lent and Easter, to feature some crosses and hearts. So head over to our Freebies Library and get your own copy to print and enjoy!
I hope these tips were helpful! Comment below if you have any awesome tips for working with printables! If you use this printable be sure to share your creations with us on social media @faithheirlooms.

*this post contains affiliate links